Carpentry - The next Level
I wrote about some of the furniture we built over the years before. We built a Kitchen Counter and a Trash Box which we replaced with a Trash Trunk later.
This post is about our largest project so far: a complete storage solution for all my stuff™.
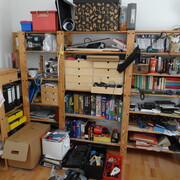
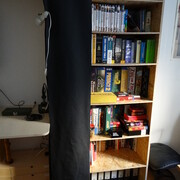
In our office we had an IKEA Sten1) shelf I had in my room when I still lived at my mom's place. It's flexibility made it fit well with all the places it moved to with me. But an open shelf has it's disadvantages. Things get dusty, it always looks messy and it's hard to store smaller things efficiently.
Most of my stuff consists of small to medium sized things since I got rid of most of my books2). So what I always wanted was something with lots and lots of drawers. But I couldn't find any affordable, suitable solution to buy. So I thought about building it myself. But building a hundred or so drawers didn't sound like fun at all.
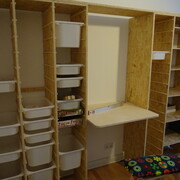
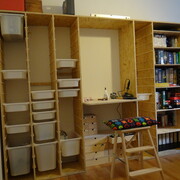
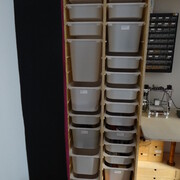
Again, IKEA proved to be the right source to find inspiration. Their children's furniture series Trofast was close to what I wanted. It uses plastic drawers of different sizes that can be combined through a simple slot system. Unfortunately all their shelves are kinda small (they are for kids after all). In the end my solution would cover 2.70 meters of wall and be 2 meters high and provide 60 “height units”.
Photos and more details after the jump.
I designed the whole thing in Tinkercad. It's not perfect but I haven't found anything better. I'm open for suggestions.
To keep costs low I opted for the cheapest wood available - OSB boards. Unfortunately those were only available in 2.50m by 1.50m so I had to buy a bit more than needed. Even with the cheap wood, the whole solution didn't come cheap. Here's a total tally (excluding some things like screws and glue that I already owned):
| Item | Source | Price | Amount | Total |
|---|---|---|---|---|
| Bekväm Stepladder | IKEA | 29.99 | 1 | 29.99 |
| Trofast Box large | IKEA | 5.00 | 3 | 15.00 |
| Trofast Box medium | IKEA | 4.00 | 8 | 32.00 |
| Trofast Box small | IKEA | 3.00 | 35 | 105.00 |
| Brackets for shelf boards (12 pack) | Hellweg | 5.09 | 2 | 10.18 |
| Brackets for wallmount | Hellweg | 1.86 | 2 | 3.72 |
| Brackets for mounting the Desk board | Hellweg | 1.10 | 4 | 4.40 |
| Kvartal Curtain Rails | IKEA | 14.99 | 2 | 29.98 |
| Kvartal Curtain Mounts and Weight | IKEA | 6.00 | 6 | 36.00 |
| Black Fabric | IKEA | 8.00 | 2.03 | 16.24 |
| Pink Fabric | IKEA | 8.00 | 2.26 | 18.08 |
| Multiplex Desk Board | Holz Possling | 5.00 | 1 | 5.00 |
| OSB 3 Board 12mm | Holz Possling | 15.94 | 1 | 15.94 |
| Cutting Service | Holz Possling | 7.66 | 1 | 7.66 |
| OSB 3 Board 18mm | Holz Possling | 23.75 | 4 | 95 |
| Cutting Service | Holz Possling | 30.63 | 1 | 30.63 |
| Square lath | Holz Possling | 1.85 | 25 | 46.25 |
| Brackets for mounting Curtain Rails | Bauhaus | 2.31 | 1 | 2.31 |
| 4 Socket Powerstrip | Amazon | 8.00 | 1 | 8.00 |
| Small parts cabinet | Amazon | 27.20 | 1 | 27.20 |
| Trip to IKEA | car2go | 11.29 | 1 | 11.29 |
| Trip to IKEA | car2go | 10.62 | 1 | 10.62 |
| Trip to Holz Possling | drive-now | 31.30 | 1 | 31.30 |
| Trip to Holz Possling | drive-now | 27.47 | 1 | 27.47 |
| Total | 619.26 € | |||
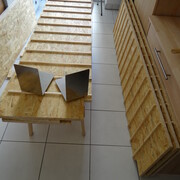
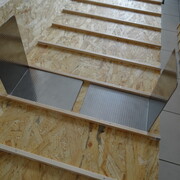
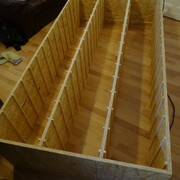
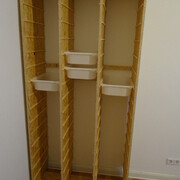
Building the rails for the Trofast boxes proved to be difficult. Measuring things is hard. Or we suck especially hard at it. We finally found some bookends that luckily had the exact size for spacing the rails and we could skip the painful measuring for that.
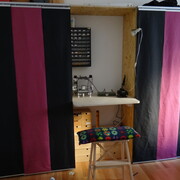
The IKEA Kvartal curtains were an afterthought so there wasn't a plan on how to mount them from the beginning. The existing IKEA brackets wouldn't fit. Instead we used simple metal brackets from the hardware store. That worked just fine. Since each Trofast box is only 30cm wide, we couldn't use the standard Kvartal curtains either as those are 60cm. Instead we bought some fabric, sewed the curtains ourselves and shortened the Kvartal mounts.
For really small parts like screws I bought an extra cabinet, it's cheap plastic but works just fine. I also reused the IKEA Moppe boxes3) I already had.
In the center of the whole solution I integrated a small workspace for soldering and similar crafting stuff. An IKEA Bekvam ladder with a pillow we already had serves as seat. All that's missing here is a proper work light - the spot light you see on the pictures is only a temporary solution.
For labelling all the boxes my trusty Brother QL-500 label printer comes in handy. For now I simply put the box contents on the label. But since that content might change frequently I am thinking about a bar code plus catalog system. But that's stuff for another project 
