
DIY Book
For a project I'm working on1), I needed some kind of “monster manual” referencing the Cthulhu Mythos universe. So I spent a few days with making one.
It's not the first time, I made a book. About 20 years ago I made a small book of my own short stories and poems. But back then I had to figure it out mostly by trial and error. This time I had YouTube to guide me…
Content
However the first part was to create the actual content. Luckily I found some very helpful resources online.
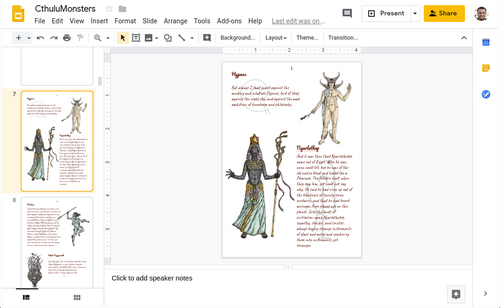
 This awesome info graphic was the list I followed to find the various creatures to add to my book. Most images and many quotes came from the Yog-Blogsoth project. Mad props to Michael Bukowski and his project to draw all the Lovecraftian creatures.
Other images and quotes I found on the following pages:
To create the layout, I used an unusual software: Google Slides. It made it easy to align, resize and layout images, insert texts and export to PDF.
To add the cool symbols found in the info graphic, I had to jump through a few more hoops. First I manually traced all symbols in Inkscape to create SVG versions. To be able to use them in Slides I then had to convert them to EMF, import them into Google Draw and then could copy'n'paste them into Slides. You'd think that Google could easily support SVG natively ¯\_(ツ)_/¯
Note: Because of the copyrighted material I used (this is a personal project only), I will not share the actual result.
Printing
Next I had to figure out how to print the pages. For the later binding, pages had to be arranged on double pages, grouped into signatures of three. Printing that on my duplex capable laser printer isn't a problem, but needs careful ordering of the pages. It took me a bit of doodling to figure out the page order to print the first 22 DIN A6 pages on three A4 sheets:

Once I had figured out this initial order, it was just a matter of repeating the pattern, to order all the 44 pages I had:
<?php

$order = [2,11,4,9,12,1,10,3,6,7,14,23,8,5,24,13,16,21,18,19,22,15,20,17];
for($i=0; $i<2; $i++) {
    foreach($order as $idx) {
        echo $idx + $i*count($order);
        echo ',';
    }
}
Next I needed a tool that could arrange the A6 pages on A4 paper. I found pdfmixtool to be up for the job. Creating the layout takes just a few steps:
- Add the original PDF
- Right click it and select edit
- Set Multipage to
2×2 A4 0° - Paste pages numbers as calculated above and hit enter
- Click Generate PDF
The resulting PDF printed just fine. I decided to use somewhat thicker paper.
Paper Aging
The next step was to age the paper. After folding the signatures, I tore the edges along a straight edge. Then each page got a generous “painting” with cold coffee. The result is a slightly yellow tint and a wavy, parchment-like look and feel.


Book Binding
Finally it was time to assemble the book. I mostly followed these videos by “Sea Lemon”:
I used Ponal wood glue which seems to be close enough to the PVA glue recommended everywhere. As a bookbinding press I simply used some clamps and a piece of wood.


Leather Cover
For the actual cover I wanted real leather. I found some nice brown leather at the leather store in my neighborhood (where I bought the leather for my ReMarkable cover as well).
I watched a whole bunch of leather work videos, but because I lacked the proper tools, I decided to not carve the leather. Instead I used some simple forming techniques.
I held the leather under warm water, then put a 3D-printed triskele under it and formed it using a small wrench. The dots around the edges where made with the back of a screwdriver. I let it dry over night before gluing the leather to the boards (using wood and contact glue).
Finally I attached some brass corners I got from eBay. I think it came out quite nice.


