
One-Mix Yoga 2
 I'm a big fan of tiny portable computers and still fondly remember my EeePC. Unfortunately the NetBooks fell out of fashion again and for a long time it was hard to get any really small laptops. But it seems the genre is coming back under the name “Ultra-Mobile PC” or UMPC.
The start made the somewhat under powered GPD Pocket, followed up by an even worse One-Mix Yoga. However both had very successful crowd funding campaigns which proved there is a demand for small computers. Both, GPD and One-Mix are Chinese companies designing, building and selling these machines in seemingly small batches with the initial production funded by crowd founding. This allows them relatively quick iterations.
Last year finally the GPD Pocket 2 was released which improved a lot on the first design and shortcomings and One-Mix followed suit just a few months ago with the Yoga 2.
I decided to get the Yoga 2 because of the slightly more powerful specs (more on that later). I bought it at Geekbuying for 559.30€ including shipping. As a pleasant surprise, the device got shipped from the Netherlands instead of directly from China so had not to pay any additional tolls and taxes.
Below follows a long post (you have been warned) about the hardware in it and how to get it running on Arch Linux with XFCE.
Hardware
The general specs for the One Mix Yoga 2 are as follows:
- Intel Core m3-7Y30 CPU
- Intel HD Graphics 615
- 8GB DDR3 RAM
- 256GB PCI-E SSD
- 7“ Touchscreen with 1200×1920 Resolution (324ppi) with Stylus Support
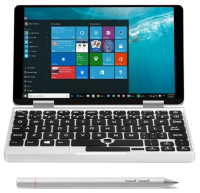
The device weighs about 515g and measures 182x110x17mm. It is absolutely tiny! It has a machined aluminum body and looks really good. Even the packaging it comes in look gorgeous.
For connectors it comes with a 3.5mm headset connector, a single USB 3.0 port, a USB-C port that also is used for charging and a Micro HDMI port. It also has a builtin SD-card reader and a fingerprint sensor. An optical sensor works as a mouse/trackpoint. It has builtin 2.4G and 5G WiFi and Bluetooth.
The Yoga 2 comes with a USB-C PD charger with a UK-Plug. Geekbuying added a flimsy little adapter to the EU-Standard. Unfortunately this combination did not work and I bought my own one. When you buy a charger you have to be careful, according to reports by others the laptop charges with 12V only (at 2.5A). Many USB-C PD chargers switch from 9V directly to 15V and do not support the 12V step. I bought an UGreen CD172 57 Watts charger which works great even though it does not list the 12V output on the label. What I don't like is that is much bulkier than the original charger.
I was curious if the charger or the adapter is broken and used my travel adapter instead. Turns out the little adapter plug is broken and the charger works just fine. Opening up the adapter showed that it is really quite simple. There is no electronics, not even a fuse. There is really nothing that can be broken except when a contact isn't there. After screwing it back together it worked fine. I guess I have two chargers now  .
.
According to the manufacturer the (non-swappable) 6500mAh battery should last about 12 hours, which is of course bullshit. In my experience about 4 to 6 hours battery life is more realistic. However there's a way to throttle the CPU by pressing FN+ESC. One-Mix calls it “quiet-mode” as it avoids spinning up the very audible fan.
As you can see from the 1200×1900 resolution, the full-HD screen's natural orientation is actually portrait mode. The pre-installed Windows 10 and the Bios settings know about this and rotate their screens accordingly. For the following Linux setup this has to be taken care of.
For turning the laptop on, the power button needs to be held for a couple of seconds. The LED on the right hand side turns blue when the laptop is running and red when charging. When suspended the LED blinks in red.
The keyboard is only available in US-Layout and of course is a little cramped. However I found it fine to use. I mostly have problems hitting Q when I meant to use the Tab key. All other key positions are fine by my book.
Pictures


Hardware as identified in Linux
Before we start, here is how all the hardware is identified by various hardware query tools on the running Arch Linux setup.
$ lspci
00:00.0 Host bridge: Intel Corporation Xeon E3-1200 v6/7th Gen Core Processor Host Bridge/DRAM Registers (rev 02)
00:02.0 VGA compatible controller: Intel Corporation Device 591e (rev 02)
00:04.0 Signal processing controller: Intel Corporation Xeon E3-1200 v5/E3-1500 v5/6th Gen Core Processor Thermal Subsystem (rev 02)
00:08.0 System peripheral: Intel Corporation Xeon E3-1200 v5/v6 / E3-1500 v5 / 6th/7th Gen Core Processor Gaussian Mixture Model
00:14.0 USB controller: Intel Corporation Sunrise Point-LP USB 3.0 xHCI Controller (rev 21)
00:14.2 Signal processing controller: Intel Corporation Sunrise Point-LP Thermal subsystem (rev 21)
00:15.0 Signal processing controller: Intel Corporation Sunrise Point-LP Serial IO I2C Controller #0 (rev 21)
00:15.1 Signal processing controller: Intel Corporation Sunrise Point-LP Serial IO I2C Controller #1 (rev 21)
00:15.2 Signal processing controller: Intel Corporation Sunrise Point-LP Serial IO I2C Controller #2 (rev 21)
00:16.0 Communication controller: Intel Corporation Sunrise Point-LP CSME HECI #1 (rev 21)
00:1c.0 PCI bridge: Intel Corporation Sunrise Point-LP PCI Express Root Port #7 (rev f1)
00:1d.0 PCI bridge: Intel Corporation Sunrise Point-LP PCI Express Root Port #9 (rev f1)
00:1e.0 Signal processing controller: Intel Corporation Sunrise Point-LP Serial IO UART Controller #0 (rev 21)
00:1e.4 SD Host controller: Intel Corporation Device 9d2b (rev 21)
00:1e.6 SD Host controller: Intel Corporation Sunrise Point-LP Secure Digital IO Controller (rev 21)
00:1f.0 ISA bridge: Intel Corporation Sunrise Point-LP LPC Controller (rev 21)
00:1f.2 Memory controller: Intel Corporation Sunrise Point-LP PMC (rev 21)
00:1f.3 Audio device: Intel Corporation Sunrise Point-LP HD Audio (rev 21)
00:1f.4 SMBus: Intel Corporation Sunrise Point-LP SMBus (rev 21)
01:00.0 Non-Volatile memory controller: Device 1d97:1160 (rev b0)
02:00.0 Network controller: Intel Corporation Wireless 3165 (rev 81)
$ lsusb
Bus 002 Device 001: ID 1d6b:0003 Linux Foundation 3.0 root hub
Bus 001 Device 004: ID 2808:9338
Bus 001 Device 003: ID 8087:0a2a Intel Corp.
Bus 001 Device 002: ID 258a:0021
Bus 001 Device 001: ID 1d6b:0002 Linux Foundation 2.0 root hub
$ sudo lshw -short
H/W path       Device  Class          Description
=================================================
                       system         Default string (Default string)
/0                     bus            Default string
/0/0                   memory         64KiB BIOS
/0/35                  memory         8GiB System Memory
/0/35/0                memory         4GiB Row of chips LPDDR3 Synchronous Unbuffered (Unregistered) 1600 MHz (0.6 ns)
/0/35/1                memory         4GiB Row of chips LPDDR3 Synchronous Unbuffered (Unregistered) 1600 MHz (0.6 ns)
/0/39                  memory         128KiB L1 cache
/0/3a                  memory         512KiB L2 cache
/0/3b                  memory         4MiB L3 cache
/0/3c                  processor      Intel(R) Core(TM) m3-7Y30 CPU @ 1.00GHz
/0/100                 bridge         Xeon E3-1200 v6/7th Gen Core Processor Host Bridge/DRAM Registers
/0/100/2               display        Intel Corporation
/0/100/4               generic        Xeon E3-1200 v5/E3-1500 v5/6th Gen Core Processor Thermal Subsystem
/0/100/8               generic        Xeon E3-1200 v5/v6 / E3-1500 v5 / 6th/7th Gen Core Processor Gaussian Mixture Model
/0/100/14              bus            Sunrise Point-LP USB 3.0 xHCI Controller
/0/100/14/0    usb1    bus            xHCI Host Controller
/0/100/14/0/2          input          USB KEYBOARD
/0/100/14/0/7          communication  Bluetooth wireless interface
/0/100/14/0/9          generic        FT9201Fingerprint.
/0/100/14/1    usb2    bus            xHCI Host Controller
/0/100/14.2            generic        Sunrise Point-LP Thermal subsystem
/0/100/15              generic        Sunrise Point-LP Serial IO I2C Controller #0
/0/100/15.1            generic        Sunrise Point-LP Serial IO I2C Controller #1
/0/100/15.2            generic        Sunrise Point-LP Serial IO I2C Controller #2
/0/100/16              communication  Sunrise Point-LP CSME HECI #1
/0/100/1c              bridge         Sunrise Point-LP PCI Express Root Port #7
/0/100/1c/0            storage        Non-Volatile memory controller
/0/100/1d              bridge         Sunrise Point-LP PCI Express Root Port #9
/0/100/1d/0    wlp2s0  network        Wireless 3165
/0/100/1e              generic        Sunrise Point-LP Serial IO UART Controller #0
/0/100/1e.4            generic        Intel Corporation
/0/100/1e.6            generic        Sunrise Point-LP Secure Digital IO Controller
/0/100/1f              bridge         Sunrise Point-LP LPC Controller
/0/100/1f.2            memory         Memory controller
/0/100/1f.3            multimedia     Sunrise Point-LP HD Audio
/0/100/1f.4            bus            Sunrise Point-LP SMBus
/1                     power          To Be Filled By O.E.M.
$ lsblk
NAME        MAJ:MIN RM   SIZE RO TYPE MOUNTPOINT
mmcblk1     179:0    0  28.8G  0 disk
nvme0n1     259:0    0 238.5G  0 disk
├─nvme0n1p1 259:1    0   512M  0 part /boot
└─nvme0n1p2 259:2    0   238G  0 part /
$ upower -i /org/freedesktop/UPower/devices/battery_BAT0
  native-path:          BAT0
  vendor:               Intel SR 1
  model:                SR Real Battery
  serial:               123456789
  power supply:         yes
  updated:              Thu 03 Jan 2019 12:30:10 PM CET (119 seconds ago)
  has history:          yes
  has statistics:       yes
  battery
    present:             yes
    rechargeable:        yes
    state:               discharging
    warning-level:       none
    energy:              30.9 Wh
    energy-empty:        0 Wh
    energy-full:         34.08 Wh
    energy-full-design:  32 Wh
    energy-rate:         1.824 W
    voltage:             7.7 V
    time to empty:       16.9 hours
    percentage:          90%
    capacity:            100%
    icon-name:          'battery-full-symbolic'
$ xrandr --query
Screen 0: minimum 8 x 8, current 1920 x 1200, maximum 32767 x 32767
eDP1 connected primary 1920x1200+0+0 right (normal left inverted right x axis y axis) 94mm x 151mm
   1200x1920     59.98*+
   1024x768      60.00
   1024x576      59.90    59.82
   600x960       60.00
   960x540       59.63    59.82
   800x600       60.32    56.25
   864x486       59.92    59.57
   640x480       59.94
   720x405       59.51    58.99
   640x360       59.84    59.32
DP1 disconnected (normal left inverted right x axis y axis)
HDMI1 disconnected (normal left inverted right x axis y axis)
HDMI2 disconnected (normal left inverted right x axis y axis)
VIRTUAL1 disconnected (normal left inverted right x axis y axis)
$ hwinfo --short
cpu:
                       Intel(R) Core(TM) m3-7Y30 CPU @ 1.00GHz, 1100 MHz
                       Intel(R) Core(TM) m3-7Y30 CPU @ 1.00GHz, 1066 MHz
                       Intel(R) Core(TM) m3-7Y30 CPU @ 1.00GHz, 1100 MHz
                       Intel(R) Core(TM) m3-7Y30 CPU @ 1.00GHz, 1100 MHz
keyboard:
  /dev/input/event8    HAILUCK CO.,LTD USB KEYBOARD
  /dev/input/event4    AT Translated Set 2 keyboard
mouse:
  /dev/input/mice      HAILUCK CO.,LTD USB KEYBOARD
  /dev/input/mice      Goodix Capacitive TouchScreen
graphics card:
                       Intel VGA compatible controller
sound:
                       Intel Audio device
storage:
                       Non-Volatile memory controller
network:
  wlp2s0               Intel Wireless 3165
network interface:
  lo                   Loopback network interface
  wlp2s0               Ethernet network interface
disk:
  /dev/nvme0n1         Disk
  /dev/mmcblk1         Disk
partition:
  /dev/nvme0n1p1       Partition
  /dev/nvme0n1p2       Partition
usb controller:
                       Intel Sunrise Point-LP USB 3.0 xHCI Controller
bios:
                       BIOS
bridge:
                       Intel Sunrise Point-LP PCI Express Root Port #7
                       Intel ISA bridge
                       Intel Host bridge
                       Intel Sunrise Point-LP PCI Express Root Port #9
hub:
                       Linux Foundation 2.0 root hub
                       Linux Foundation 3.0 root hub
memory:
                       Main Memory
bluetooth:
                       Intel Bluetooth Device
unknown:
                       FPU
                       DMA controller
                       PIC
                       Keyboard controller
                       Intel Sunrise Point-LP PMC
                       Intel Skylake Gaussian Mixture Model
                       Intel Sunrise Point-LP Serial IO I2C Controller #1
                       Intel Sunrise Point-LP Secure Digital IO Controller
                       Intel SD Host controller
                       Intel Skylake Processor Thermal Subsystem
                       Intel Sunrise Point-LP CSME HECI #1
                       Intel Sunrise Point-LP Serial IO UART Controller #0
                       Intel Sunrise Point-LP Serial IO I2C Controller #2
                       Intel 100 Series PCH/Sunrise Point PCH I2C0 [Skylake/Kaby Lake LPSS I2C]
                       Intel Sunrise Point-LP Thermal subsystem
                       Intel Sunrise Point-LP SMBus
                       Focal-systems.Corp FT9201Fingerprint.
Arch Linux Base Setup
Besides the official Arch Linux Installation Guide, I basically followed guides by github user joshskidmore and Reddit user mogen317 for the similar GPD Pocket 2.
The difference is that the Yoga 2 has a faster NVMe SSD, which results in a different block device name and I did not bother with setting up encryption or keeping Windows.
Please also refer to the three linked guides above and make sure you understand what your'e doing when folling my notes here. I assume this is not your first Arch install.
The Yoga 2 only supports UEFI booting, which is more modern but also a bit more mysterious to me (being an old fart). Anyway, download the latest Arch ISO and flash it to an USB stick. Insert the stick and hold FN-F7 when booting the machine to bring up the boot menu.
Once you're in the shell, rotate the screen:
echo 1 > /sys/class/graphics/fbconv/rotate_all
Next, connect to WiFi:
  wifi-menu
  systemctl restart dhcpcd.service
  ping google.com
Partition the disk using
gdisk /dev/nvme0n1
We create only two partitions: EFI and our root file system.
o ↵ to create a new empty GUID partition table (GPT)
y ↵ to confirm

n ↵ add a new partition
↵ to select default partition number of 1
↵ to select default start at first sector
+512M ↵ make that size partition for booting
ef00 ↵ Partition type EFI

n ↵ to add new partition
↵ to select default partition number of 2
↵ to select default start of sector
↵ to select default end of sector
8300 ↵ to make partition type for linux

p ↵ if you want to check the partition layout
w ↵ to write changes to disk
y ↵ to confirm
Next create the filesystem for both partitions:
  mkfs.fat -F32 /dev/nvme0n1p1
  mkfs.ext4 /dev/nvme0n1p2
Then mount the new partitions, bootstrap the first packages and create the fstab:
mount /dev/nvme0n1p2 /mnt
mkdir /mnt/boot
mount /dev/mmcblk0p1 /mnt/boot
pacstrap /mnt base base-devel dialog openssl-1.0 bash-completion git intel-ucode wpa_supplicant
genfstab -pU /mnt >> /mnt/etc/fstab
Time to chroot into the new system, create the init disk and install the bootloader:
  arch-chroot /mnt /bin/bash
  mkinitcpio -P
  bootctl install
Next we need to create bunch of files.
Set the hostname:
- /etc/hostname
krill
Set a somewhat larger console font:
- /etc/vconsole.conf
FONT=latarcyrheb-sun32
Prepare the boot loader:
- /boot/loader/entries/arch.conf
title	Arch Linux
linux	/vmlinuz-linux
initrd	/intel-ucode.img
initrd	/initramfs-linux.img
options	root=/dev/nvme0n1p2 rw fbcon=rotate:1
- /boot/loader/loader.conf
timeout 3
default arch
console-mode keep
Prepare the locales
- /etc/locale.conf
LANG=en_US.UTF-8
LANGUAGE=en_US
LC_ALL=C
- /etc/locale.gen
en_US.UTF-8 UTF-8
Finally we set the timezone, generate the locales, set a root password and create the first user.
ln -sf /usr/share/zoneinfo/Europe/Berlin /etc/localtime
systemctl enable systemd-timesyncd.service
systemctl start systemd-timesyncd.service
locale-gen
passwd
useradd -m -U -G wheel,storage,power -s /bin/bash andi
passwd andi
Time to reboot
exit
umount -R /mnt
# Remove USB stick and reboot
reboot
You should now have a minimal, console-only Arch Linux running.
Power Management
To enable power management and overheat protection, install thermald and tlp. The default configs should suffice.
pacman -S thermald
sudo systemctl enable thermald.service
sudo systemctl start thermald.service
pacman -S tlp
sudo systemctl enable tlp
sudo systemctl start tlp
User Groups
You may or may not need to add your user to a handful of additional groups. If you run into trouble later on try these groups:
sudo usermod -a -G lp andi
sudo usermod -a -G rfkill andi
sudo usermod -a -G users andi
sudo usermod -a -G video andi
sudo usermod -a -G audio andi
sudo usermod -a -G network andi
X and XFCE
Time to get the graphics going. Install the packages (accept the defaults for the meta packages).
pacman -S xorg xf86-video-intel mesa xfce4 xfce4-goodies lightdm lightdm-gtk-greeter light-locker gnome-keyring xrandr
Graphics Card
The Yoga 2 uses Intel's integrated graphics chip. It will be auto detected by X, but it can be tuned a bit using the following config:
- /etc/X11/xorg.conf.d/20-intel.conf
Section "Device"
  Identifier    "Intel Graphics"
  Driver        "intel"
  Option        "AccelMethod"            "sna"
  Option        "TearFree"               "true"
  Option        "DRI"                    "3"
EndSection
Display
We already rotated the display to the right in console, but this needs also be done for X.
- /etc/X11/xorg.conf.d/30-display.conf
Section "Monitor"
  Identifier    "eDP1"
  Option        "Rotate"                 "right"
EndSection
TouchScreen
This just calibrates the touchscreen.
- /etc/X11/xorg.conf.d/99-touchscreen.conf
Section "InputClass"
  Identifier    "calibration"
  MatchProduct  "Goodix Capacitive TouchScreen"
  Option        "TransformationMatrix"   "0 1 0 -1 0 1 0 0 1"
EndSection
Optical Touch Sensor
This allows you to press the left and right button at the same time to do a middle click. It also emulates a scroll wheel when you hold the right button and swipe the sensor.
- /etc/X11/xorg.conf.d/50-trackpoint.conf
Section "InputClass"
  Identifier      "trackpoint"
  MatchProduct    "HAILUCK CO.,LTD USB KEYBOARD"
  MatchIsPointer  "on"
  Driver          "libinput"
  Option          "MiddleEmulation" "1"
  Option          "ScrollButton" "3"
  Option          "ScrollMethod" "button"
EndSection
Start X
After the configs above, you should be able to enable X and have it log into XFCE.
systemctl enable lightdm
systemctl start lightdm
DPI Finetuning
XFCE should be running now but you probably want to do some fine tuning to compensate for the tiny screen and high resolution.
There are two aproaches: Font DPI adjustment and xrandr based scaling. The latter simply takes the full resolution of 1920×1200 and scales it down to something smaller. I wasn't really happy with the results though. It looked somewhat blurry and you loose a lot of screen estate.
Instead I went for the Font DPI adjustment. Go to Settings → Appearance → Fonts and use Custom DPI Setting. I set it to 150 DPI. This adjusts the font rendering and XFCE mostly scales the UI accordingly.
You may also want to switch the Window Manager theme to a HDPI theme: Settings → Window Manager → Style and pick Default-hdpi.
Setting up some keyboard-shortcuts to start your most used tools and for resizing/arraning windows without reaching for the mouse/touchscreen is probably also useful. See what I wrote about that when I set up my other laptop.
Additional Setup
You have a basic desktop now, but there's some more hardware to set up.
Tilt Sensor
One of the features of the Yoga 2 is that you can turn the display a full 360° to create a tablet. The keyboard is automatically switched off (except for the power button).
Since you probably want to hold a tablet differently than a traditional laptop, the screen should be rotated automatically depending on how you hold the tablet. The sensor for that is available as an IIO device.
$> cat /sys/bus/iio/devices/iio\:device0/name
BMC150A
If you're running Gnome, you probably want to install the iio-sensor-proxy package and look into this blog post on how to adjust it for the rotated screen of the Yoga.
Since I'm not running gnome, I needed a different solution. I found a small C program to read the sensor and adjusted it to the Yoga 2 specifics.
Download and install it from the git repository:
$> git clone https://github.com/splitbrain/2in1screen.git
$> cd 2in1screen
$> make
$> sudo make install
Autostart it from your .xprofile file.
- ~/.xprofile
if [ -x "/usr/local/bin/2in1screen" ]; then
    /usr/local/bin/2in1screen &
fi
Now everytime you turn your device, the tool will call xrandr to adjust your display rotation (including the touchscreen mapping).
Sound
Everything should be auto-detected. All you need is to install some packages.
pacman -S pulseaudio pulseaudio-alsa alsa-utils pavucontrol pulseaudio-bluetooth
To make the volume buttons work, I installed an AUR package:
yay -S xfce4-volumed-pulse
Bluetooth
Bluetooth works fine as well. The blueberry tool gives you a simple interface to pair devices. I had no trouble connecting my Philips Bluetooth headphones.
pacman -S bluez bluez-utils bluez-tools blueberry
systemctl enable bluetooth
systemctl start bluetooth
Network
For a laptop it makes most sense to manage the WiFi connections via the graphical network manager interface.
pacman -S networkmanager network-manager-applet nm-connection-editor networkmanager-openvpn openvpn gvfs gvfs-smb bind-tools
systemctl enable NetworkManager
systemctl start NetworkManager
SD Card
The Yoga 2 has a SD card slot. It works fine just out of the box. If you would like to use the slot as some-what permanent storage extension (instead of relying on mounting the card via XFCE's thunar). You can use systemd's auto mounter for that.
First format the card, I used the f2fs filesystem here. Then set up the mount point an permissions for your user.
sudo mkfs.f2fs -l SDCARD -f /dev/mmcblk1
mkdir /home/andi/sd
mount /home/andi/sd
sudo chown andi:andi /home/andi/sd
For automounting add an entry to the fstab.
- /etc/fstab
LABEL=SDCARD /home/andi/sd f2fs defaults,noauto,x-systemd.automount,x-systemd.device-timeout=10 0 0
This way the card is mounted automatically whenever you access the mountpoint.
Touchscreen Wakeup Hack
The touchscreen generally works fine, but after the device suspends and wakes up again, no touch events are registered anymore. Reader David Grimbichler dug deeper into the problem and found a work around:
First of all the acpi_call kernel module needs to be installed:
sudo pacman -S acpi_call-dkms
This can then be used to send a special command via ACPI to properly reset the touchscreen and reinit the goodix driver. To do so create the following script.
- /bin/goodix.sh
#!/bin/sh

modprobe -r goodix
sleep 1s
echo '\_SB.PCI0.I2C2.TCSE.INTO 0' > /proc/acpi/call
sleep 1s
modprobe goodix
Make sure it's executable:
sudo chmod 755 /bin/goodix.sh
Finally create a systemd unit to run it on suspend wakeup:
- /etc/systemd/system/goodix.service
[Unit]
Description=Wakeup
After=suspend.target

[Service]
Type=oneshot
ExecStart=/bin/goodix.sh

[Install]
WantedBy=suspend.target
Enable the module, then reboot.
sudo systemctl enable goodix
sudo reboot
Now the touchscreen should properly reinitialize after a wakeup.
Stuff that doesn't work
The above should give you a pretty usable Linux machine. Unfortunately not all the hardware works as it should under Linux.
If anyone figures out how to get this hardware working, please let me know!
Stylus Support
The stylus is pretty much unusable on Linux. It gets detected as a finger about a centimeter from the screen. The buttons on it do nothing.
I don't really understand how it is supposed to work at all. From what I understand, Wacom based stylus support is implemented by effectively having two touchscreen devices laid on top of each other. One accepting touch, the other reacting to the stylus. But the Yoga is not using a Wacom Digitizer.
On the Yoga there seems to be only one device - the Goodix screen. This is actually the very same screen as in the GPD Pocket, which claims absolutely no stylus support at all. Weird. It works on Windows, so there is clearly some missing driver.
Goodix themselves seem to offer a driver with stylus support at Github but I have no idea how to compile it – the README isn't really helpful to me. The sources seem to be GPL licensened, so I wonder why it doesn't get merged with the goodix Kernel driver.
Update: I got feedback from Bastien Nocera who is the main Linux Kernel developer for the goodix driver:
The goodix driver that's currently in the kernel is based off an old driver that Goodix didn't try to get upstream. Their driver and my version diverged as mine was cut down, and retooled to match the expectation of code quality for upstream drivers.
As it stands, I don't have any working hardware that uses the Goodix driver, so, as you can expect, even less so of a device with pen support.
If somebody sends me hardware that I would actually use day-to-day with those features, I might actually look at adding support for the pen.
Touchscreen on Suspend
The touchscreen works fine after boot. However when the machine suspends to RAM, the touchscreen no longer recognizes any input after waking up. I talked to the maintainer of the goodix driver who suggested it may be some I2C problem. But there's absolutely no error message pointing in that or any other direction.
Update: it seems it isn't a I2C problem at all. A workaround hack has been posted above.
Fingerprint Sensor
The sensor identifies as “Focal-systems.Corp FT9201 Fingerprint”. But that device is not on the list of supported devices for libfprint. It's a pity, it worked fine on Windows.
Summary
Is it worth it? For me it is. This is not the laptop I would take to a hackathon, a customer meeting or even use as my primary device.
This get's thrown in the bag when I travel and expect that I might have a little downtime for coding. It runs IntelliJ Idea just fine, but of course I'm much slower on it than on my two-monitor desktop setup. But it also takes virtually no extra space or weight, so it's the machine to bring when you normally would not bring a laptop at all.
It's a pity the touchscreen and stylus aren't fully working, because these really set the Yoga 2 apart from the GPD Pocket 2. I guess the faster SSD may still weight the favor slightly towards the Yoga though.